Baseball Drill Library
Browse 155+ proven baseball drills designed to make practices faster, smarter, and more fun for youth coaches. From hitting and fielding drills to pitching and catching fundamentals, find age-appropriate exercises for every skill level.

Browse Drills by Category
Expand any category to see all available drills. Click any drill to view full details.
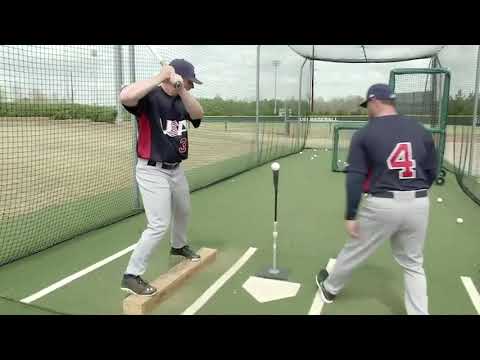
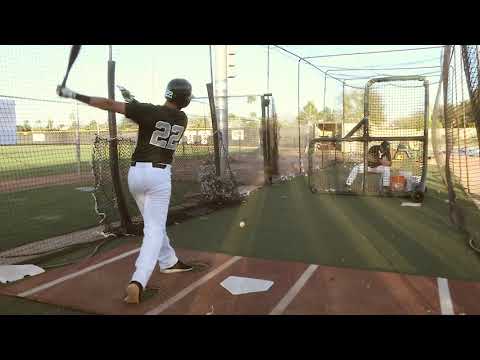
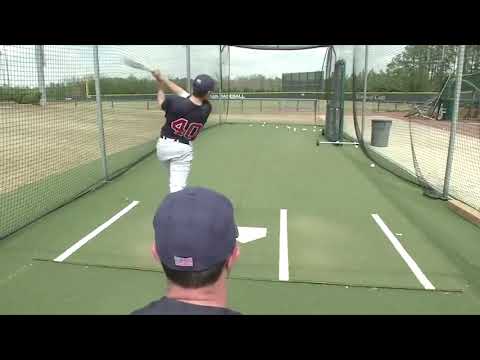
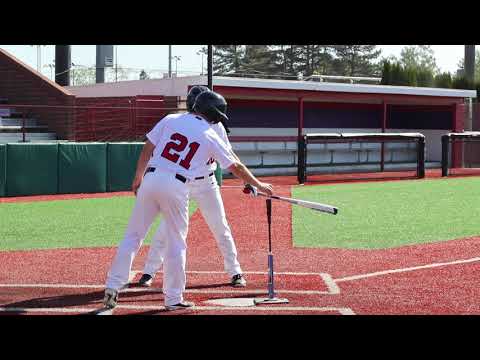
Master batting mechanics, tee work, and swing development with proven hitting drills
1-2-3 Drill
Fundamental tee drill that breaks down the swing into three components: load, stride, and swing, teaching proper sequence and timing.
1-2-3 Rhythm Tee
Advanced tee drill using footwork to develop rhythm and timing, coordinating the entire body for powerful, balanced swings.
3 Plate Hitting Drill
Vary the distance between the pitcher and home plate to simulate timing for offspeed pitches and encourage athleticism in the swing. Use three preset distances and alternate between them each swing.
4 Corners Bunting
Station-based bunting drill where players practice bunting to different locations: first base, third base, and drag bunts. Utilizes the entire infield so that 4 players get the chance to bunt at once.
7 Ball Front Toss
Front toss drill using numbered zones (1-7) to develop plate coverage and understanding of pitch locations, building strike zone awareness.
90/45/Even Progression Tee
Progressive tee drill that helps hitters stop pulling off the ball by gradually working from extreme open stance to normal stance.
Angled Force Plate Tee - Back Foot
Biomechanical drill using an angled force plate to prevent back leg drift and teach proper weight distribution during the load phase.
Angle Flips
Front toss variation where the tosser is positioned at an angle, helping hitters work on inside-out swing path and staying inside the ball.
Back Foot Cone Tee
Tee drill using a cone constraint behind back foot to prevent spinning and teach direct energy transfer through the ball.
Back Hip Load Tee
Advanced tee drill using a second tee as a constraint to teach proper back hip loading without over-rotation or rounding.
Back Net Constraint Tee
Advanced drill using a net behind the hitter to prevent early barrel dump and teach proper bat path and weight transfer.
Backside Angle Toss
Advanced front toss drill with tosser positioned behind and to the side, forcing hitter to stay back and use proper swing path.
Balance Beam
Tee drill using a balance beam to develop stability, weight distribution, and controlled mechanics throughout the swing.

Ball Down Front Toss
Front toss drill with a baseball placed in front of plate as a visual reference to teach proper bat path and hand path to the ball.
Ball-Hit Front Toss
Front toss drill incorporating verbal cues ("ball"/"hit") to improve pitch tracking, timing, and visual focus.

Bat Behind Hips
Tee drill where bat is placed behind the back to isolate and develop proper hip rotation in the swing.

Beginner Bunting Fundamentals
Essential bunting technique drill teaching young players proper grip, stance, and bat angle for successful sacrifice bunts and bunt-for-base-hit situations.
Behind the Hitter Toss 1-2-3
Advanced reaction drill where tosser throws from behind the hitter, developing quick hands, bat speed, and reaction time.
Belly Button Tee
Simple tee drill with focus on rotating the belly button (core rotation) to activate lower half and generate power.
Change-Up Front Toss
Front toss drill mixing regular speed and change-up speeds to develop timing, patience, and the ability to adjust to off-speed pitches.
Change-Up Tee
Advanced tee drill with ball positioned deeper than normal to simulate change-up contact point, teaching how to stay back and let ball travel.
Color Soft Toss
Advanced pitch recognition drill using colored balls to develop visual tracking and decision-making mid pitch. Coach tosses two colored balls and tells the player which one to hit.

Front Toss Progression
Controlled front toss sequence to build repeatable contact before moving to live.

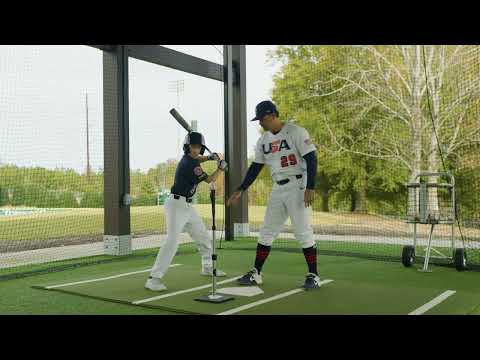
Hips Fire First Tee Drill
Hip-separation hitting drill that teaches athletes to fire the hips before the hands while a coach provides light hand resistance.
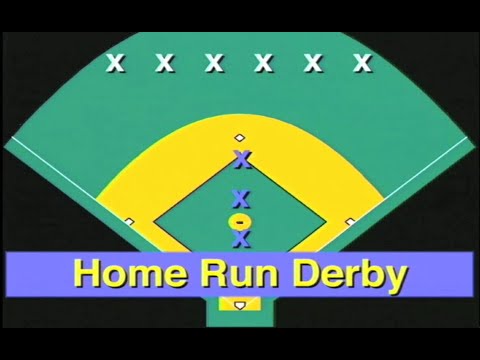
Homerun Derby
Classic hitting competition where players compete to hit the most home runs in a set number of swings. Builds power hitting skills while creating exciting team competition.
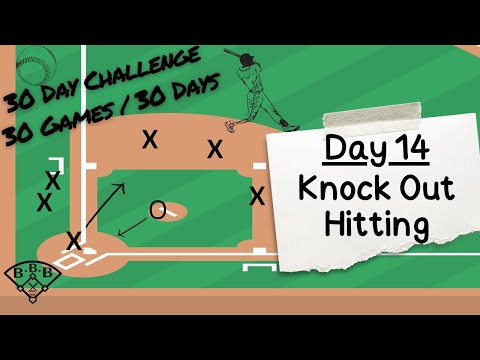
Knockout Hitting
Progressive elimination hitting drill where players must complete specific hitting tasks based on skill level or they are "knocked out". Perfect for building competitiveness and improving hitting skills under pressure.
Tee Work Basics
Foundational hitting drill using a batting tee to develop proper swing mechanics, bat path, and consistent contact across all zones.
The Grass Game
Competitive hitting elimination game where players get one swing to hit the ball into the grass or they are eliminated. Last player standing wins this exciting batting challenge.
Top Hand Bottom Hand Tee Work
One-handed tee drill using only bottom hand to develop proper hand path, extension, and bottom-hand strength.

Wiffle Ball Circle
A great fun drill that keeps a bunch of kids engaged. A great game for before practice or during off hours for hitters.
Zombies and Survivors
Exciting wiffle ball hitting game where players must hit line drives past the coach to survive. Eliminated players become "zombies" in the field who can return to hitting by catching fly balls.
Perfect ground balls, fly balls, and defensive positioning fundamentals
1st Base Flip to Pitcher
Essential first base drill teaching the 3-6-1 play where the first baseman fields a ground ball and flips to the pitcher covering first base.
1st Base Inside Receiving
Teach first basemen proper footwork and positioning for receiving throws from infielders, emphasizing target presentation and adjustments.
1st Base Off Bag
Develop first baseman's ability to field ground balls after breaking from holding a runner, using proper shuffle footwork.
1st Base Receiving
Fundamental drill for teaching first basemen proper receiving technique, footwork, and stretching mechanics for all types of throws.
1st Base Receiving Short Hops
Advanced first base drill teaching how to pick short hop throws, an essential skill for turning errant throws into outs.
21 Outs Game
The 21 Outs Game is a defensive challenge that tests a team's focus, communication, and consistency. The goal is to record 21 consecutive outs without a mistake. Any error — physical or mental — resets the count to zero. It's a fun, high-pressure way to simulate real-game defense and build team accountability.
2nd Baseman Backhand Flip
Teach second basemen the backhand flip feed to shortstop for double plays, emphasizing ball control and accuracy.
2nd Baseman Drop Step Throw
Develop second baseman's ability to quickly pivot and make short, accurate dart throws to second base on double play balls.
2nd Baseman Forehand Spin
Advanced double play feed where second baseman fields on the run toward second and uses forehand spin to deliver ball to shortstop.

2nd Baseman Underhand Flip
Classic underhand flip feed from second baseman to shortstop, the most common and reliable double play feed.

3rd Base Drill
Excellent warm-up drill with third baseman, first baseman, and catcher each with backup. Coach hits ground balls to third baseman who throws to first, then players rotate positions clockwise.
4.3 Drill
Competitive timing drill where each infield position tries to field a grounder and complete the throw to first base in 4.3 seconds or less.
8 Ball Softball Outfield Drill
The 8-Ball drill helps outfielders practice making plays while moving in different directions. Players get eight opportunities to field balls hit around them in various locations.
Alligator Hands Grounders
Foundational ground-ball drill teaching two-hand “alligator” secure and centered funnel.
Alternating Shorthop Ladder
Progressive fielding drill using alternating short hop bounces to develop quick hands, proper footwork, and confidence handling difficult hops in rapid succession.
Around the Horn
Great indicator drill of team improvement over the season. Timed drill where ball goes from pitcher to catcher, then to third, second, first, and back to catcher with pattern reversing.
Backhand Pick & Stick Fungo
Catching drill for blocking balls in the dirt with emphasis on backhand technique on balls to either side of the catcher.
Backhand Rake Fungo
Fungo drill teaching backhand fielding technique where players 'rake' through the ball rather than stabbing at it.
Belly Up
Fun fielding drill where players start lying on their backs and must quickly get up to field ground balls. Develops reaction time, agility, and fielding fundamentals in an engaging format.
Box Drill- 2nd Baseman Double Play Feeds
Stationary drill isolating the second baseman backhand flip feed, building muscle memory for double play feeds.
Box Drill- Shortstop Double Play Feeds
Stationary drill isolating the shortstop underhand flip feed, building muscle memory for double play feeds.
Break Down and Come Through
Fundamental fielding drill teaching players to attack the ball, get their body in proper position, and field the ball on the move.

Common Defensive Situations
Pre-scripted defensive scenarios with placed runners to practice alignments, covers, and throws.
Diamond Drill
Simple but excellent warm-up drill with three players at each base throwing the ball around the horn. Challenge teams to count consecutive throws without drops or overthrows.
Goalie Drill
Particularly effective for younger players early in season. Player stands between cones while coach tries to roll balls past them. Focus is on slapping ball away, not catching.
Groundball Competition
Competitive fielding drill where players compete to field the most ground balls cleanly in a set time period. Builds fielding fundamentals while adding excitement through friendly competition.
Groundball Quick Catch
Fast-paced fielding drill emphasizing quick glove work and rapid ball transfer. Develops soft hands, quick reactions, and efficient fielding mechanics for game situations.
High Toss Short Hop Drill
Coach or Player throws ball up in the air. Regardless of where the ball is thrown, the player must time themselves to catch the ball on the short-hop (the moment after the ball has bounced on the ground). In order to do so, they must have good footwork and timing.
Knockout Fielding
Competitive elimination fielding drill where players must successfully field and throw to targets to stay in the game. Each round increases in difficulty, testing players' fielding skills under pressure.
Lead Drill
Excellent skill drill that gets players used to catching the ball on the run. Develops hand-eye coordination while the fielder is moving and serves as great conditioning for older players.
Outfield Reads & Drops
Teaches first step drop, angles, and two-hand high catches with aligned throws.
Reaction Drill
Fast-moving drill for players and coaches using soft balls. Players run from cone to cone while coach throws balls at each turn. Helps players catch balls on the run and cover bases quickly.
Relay Drill
One of the most popular drills with players. Outfielder retrieves ball and throws to infielder who turns and tries to knock down cones. Great competition game with scoring system.
Relays & Cutoffs Circuit
Short relay circuit connecting outfield to infield with alignment, loud calls, and efficient turns.
Rundown Drill
Teaches much-needed rundown skills with up to nine players in three separate rundowns. Focus on running runner back to base he came from with scoring system for competition.
Short Hop Drill
Teaches players to be comfortable catching ground balls on short hops. Done with two lines on knees about 20 feet apart, emphasizing two-hand catches without turning head.
Shorthop Gauntlet
Challenging fielding drill where players navigate through a series of short hop ground balls, building confidence and skill in handling difficult bounces under pressure.
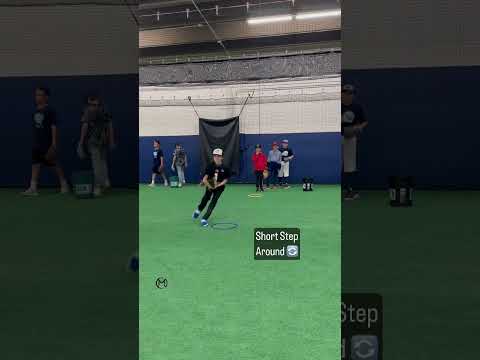
Shuffle Step Around
Agility and footwork drill using cones to teach proper shuffle steps and body positioning for infielders. Develops lateral movement and defensive positioning skills.
Soft Fly
Beginning season drill using soft covered balls and racket to help shy players get used to catching fly balls. Gets kids comfortable judging fly balls without fear of injury.

Tag and Flip
Dynamic softball fielding drill combining tagging technique with quick ball transfer and flip throws. Develops hand-eye coordination and defensive reaction time.
Develop receiving, blocking, and throwing skills for catchers
All Together Receiving
Comprehensive catching drill focusing on receiving all pitch types and locations, emphasizing soft hands, framing, and proper stance.
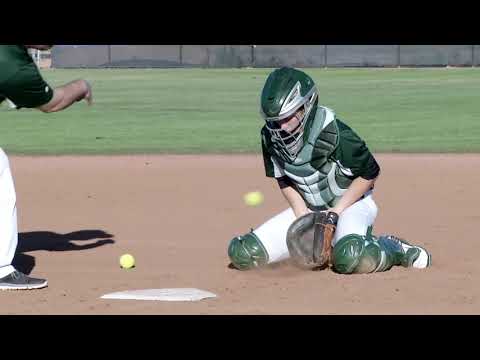
Basic Blocking
Fundamental catching drill teaching basic blocking technique for balls in the dirt directly in front of the catcher.
Basic Receiving
Foundational catching drill using tennis balls and no glove to develop soft hands and proper receiving technique.
Bite the Ball
Catching drill emphasizing chin position during blocking, using tennis balls to teach proper head placement and body angle.
Block and Recover
Catching drill combining blocking with quick recovery and throwing motion, simulating game situations with runners.

Blocking Side-to-Side Drill
Improve lateral blocking ability for pitches in the dirt to left and right, developing quick feet and proper blocking angle.
Block, Recover, Throw
Advanced catching drill adding actual throws after blocking, developing complete skill sequence for handling wild pitches with runners on.
Catcher Pop Time Drill
Develop sub-2.0 pop time through proper footwork, quick transfer, and accurate throws to second base.
Build arm strength, accuracy, and proper throwing mechanics
10 Baseball Throwing Drills for Kids
Collection of basic throwing drills for youth baseball players. Will also translate to softball.

21-Point Throwing Accuracy
Competitive accuracy game to reinforce consistent chest-high throws under light pressure.
2-Line Relay
Competition drill players enjoy where two lines compete to relay ball from back to front fastest. Teaches turning to glove side and quick ball release.
3-Man Relay
Relay drill teaching quick transfers, accurate throws, and communication essential for cut-off and relay situations.
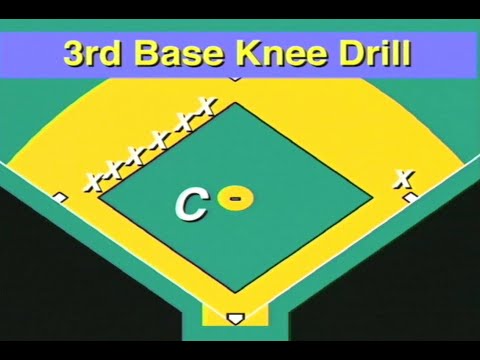
3rd Base Knee
Fun drill teaching the long throw from third to first without using your legs. Players throw from their knees to emphasize whole-body mechanics and gain feel of upper body in isolation.
A Drill to Teach Young Athletes Proper Throwing Mechanics
Simplified, effective drill specifically designed to teach proper throwing mechanics to young athletes. Makes complex motion easy to understand and execute.

A Throwing Routine For All Youth Baseball Players
Age-appropriate throwing routine designed specifically for youth players. Builds proper habits while respecting developing arms and bodies.
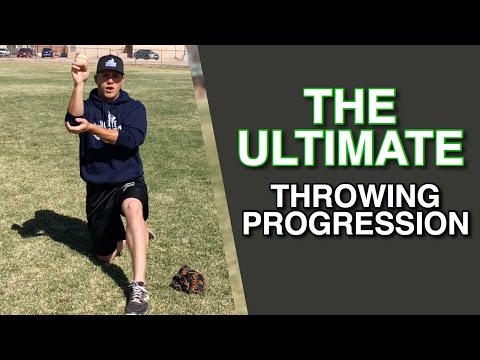
Baseball Throwing Progression Drills You MUST Be Doing
Essential throwing progression drills that systematically build proper mechanics and arm strength. These drills are fundamental for developing throwing excellence.
Bat Knockdown Throwing Game
Stand a bat up vertically on home plate and have all players line up a set distance away based on arm strength and skill level. Start close. You can play a knockout version or winner take all. In knockout, have all players take turn throwing (one at a time) until someone knocks down the bat. The first player to do so wins and no longer throws. Move all players back and repeat. In the winner take all version you can start further back. Find a distance that will be difficult, and the first player to knock down the bat (or hit it) wins!
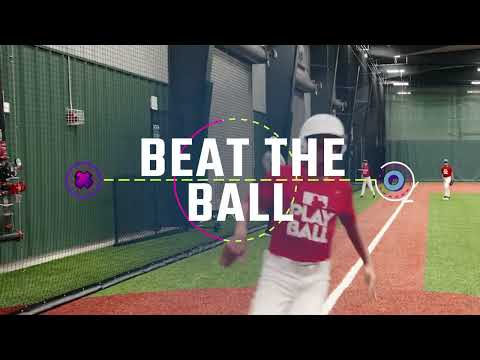
Beat the Ball
High-energy competitive drill where baserunners race against fielders throwing the ball around the bases. Perfect for building throwing accuracy, catching skills, and baserunning speed in a fun team competition format.
Develop The Perfect Throwing Motion - Baseball Throwing Tips
Comprehensive guide to developing ideal throwing motion with specific tips and techniques for each phase. Create consistent, powerful, accurate throws.
How To Stop "Short-Arming" The Ball
Corrective drill to eliminate short-arming tendency and develop full arm extension for increased power and reduced injury risk.
How to Throw a Baseball - Baseball Throwing Mechanics
Comprehensive breakdown of proper baseball throwing mechanics from grip to release. Master the fundamental techniques that create accurate, powerful throws.
Linemaster
Simple, fun throwing and catching drill where team lines up and line master throws to each player in sequence. Excellent early season drill especially good for younger players.
Line Throw
Warm-up drill where players assemble in two lines and practice throwing accuracy to first base. Each player picks up the ball closest to him and throws to first base.
One-Knee Throwing Drill
Isolate upper body throwing mechanics by removing lower body, focusing on arm path, shoulder rotation, and proper release point.
Throwing Drill For Those Who Shot Put The Ball Or Lose Power
Corrective throwing drill specifically designed to fix shot-putting motion and restore proper arm extension and power generation.
Throwing Ladder Progression
Progressive throwing warm-up from short to long distances emphasizing mechanics and accuracy.
Throwing Progression for Youth Players
Step-by-step throwing progression designed specifically for youth baseball players. Builds arm strength safely while establishing proper throwing habits.
Top 5 Drills to Add into YOUR Throwing Program
Five essential drills that should be part of every player's throwing development program. Comprehensive approach to building arm strength and accuracy.
Top 7 Throwing Drills For Baseball Players
Seven highly effective throwing drills covering all aspects of arm development from mechanics to strength. Perfect for regular practice integration.
Towel Throwing Drill
A corrective drill using a towel to help players develop proper throwing mechanics. This drill is especially useful for players who short-arm the ball or have an improper release point.
Develop speed, smart baserunning decisions, and stealing techniques
All the Way Through 1st Base
Teach players to run hard through first base on ground balls, focusing on proper foot strike technique and controlled deceleration after the bag.
Base Running Circuit
A comprehensive baserunning station drill that teaches players how to run out of the batter's box, run through first base correctly, and take the proper angle for extra bases.
Base Running Relay Race
Fun intro baserunning drill reinforcing bag tags, turns, and hustle with minimal instruction. A pure relay race around the bases. One team starting at home plate and the other starting at second base
Breakdown Baserunning Drill
A baserunning drill that teaches players how to run hard through first base and then break down properly to avoid being tagged on an overthrow.
Dirt Ball Reads
Train baserunners to recognize balls in the dirt and make quick decisions about advancing, developing aggressive but smart baserunning instincts.
Leads and Breaks
Advanced baserunning drill teaching proper leadoff technique, reading pitcher movements, and explosive first steps for stealing bases and advancing on wild pitches.
Tag Up Drill
Teaches baserunners the proper technique for tagging up on fly balls and advancing to the next base. This drill helps players understand when and how to tag up effectively.
Master pitching mechanics, control, and pitch development
Arm Speed
Fundamental pitching drill focusing on developing quick arm action and proper arm speed through the release point.
Balance Drill
Pitching drill developing balance at the top of the leg lift and teaching proper sequencing from balance point through delivery.
Balanced Stationary Drill
Pitching drill from a static position teaching proper core engagement and extension without lower body involvement.
Balanced Stationary Drill with Upper Body
Progression of stationary drill adding upper body rotation to develop complete throwing motion from a set position.
Balance Pause Drill
Pitching drill emphasizing balance at the top of the leg lift by holding the position before delivering the pitch.
Break of the Hands Drill
Critical pitching drill teaching proper timing of hand separation, ensuring hands break at the right point in the delivery.
Chair Drill
Advanced pitching drill using a chair to teach proper stride length, direction, and preventing early hip rotation.
Change-Up Catch
Pitching drill focusing on throwing change-ups with same arm speed and mechanics as fastballs, developing deception.
Change-Up Grips
Pitching drill for experimenting with different change-up grips to find which works best for each individual pitcher.
Towel Pitching Drill
A pitching drill using a towel to teach proper posture, front-side mechanics, and delivery without using a baseball. This drill helps pitchers develop muscle memory for correct mechanics.
Build focus, confidence, and mental toughness for peak performance

5 Mental Toughness Exercises Every Athlete Should Practice
Five fundamental mental toughness exercises applicable to all athletes. Build resilience, focus, and psychological strength through regular practice.
Four-Step Mental Skills Routine for Softball
Simple, effective four-step mental routine for softball players to maintain focus and composure during competition. Applicable to all positions.
Four Steps to Mental Toughness for Softball Pitchers
Specific mental toughness training for softball pitchers. Four-step approach to developing the mental resilience required for pitching success.
Make Fewer Errors With Mental Skills For Softball Infielders
Mental training techniques specifically for infielders to reduce errors through improved focus, confidence, and error recovery strategies.

Mental Imagery for Softball
Detailed guide to using mental imagery and visualization for softball performance enhancement. Learn to create effective mental practice sessions.
Mental Skills Bootcamp - Session 4
Intensive mental skills training session focusing on practical application of mental performance techniques in softball contexts.
Mental Training Tips For Softball Coaches & Players
Comprehensive mental training guidance for both coaches and players covering key mental skills, implementation strategies, and team culture development.
Softball Mental Skills Training
Comprehensive mental skills training series covering multiple aspects of mental performance for softball players and coaches.
Dynamic stretches, throwing progressions, and injury prevention
30 Second Backhand
Partner drill developing backhand fielding technique with focus on staying low, proper glove position, and tracking the ball.
30 Second Backhand Cross
Advanced backhand drill teaching crossover step technique for balls hit further to glove side, developing range and agility.
30 Second Crow Hops
Fundamental drill teaching proper footwork for fielding ground balls on the move and getting into throwing position.

30 Second Grounders
Basic partner drill for developing soft hands and proper glove position on routine ground balls.
30 Second Quick Toss
Hand-eye coordination drill developing quick hands, soft hands, and throwing accuracy at game speed.
30 Second Short Hops
Essential drill for learning to pick short hops, teaching proper glove work and hand position for bad bounce grounders.
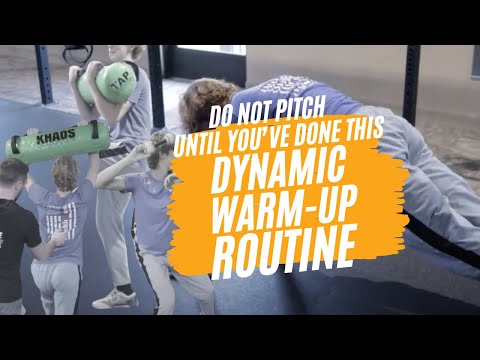
Dynamic Warmup Routine for Baseball Pitchers
A specialized pitcher-focused dynamic warmup sequence designed to prepare the arm, shoulder, and entire kinetic chain for throwing. Essential pre-pitching routine to prevent injury.
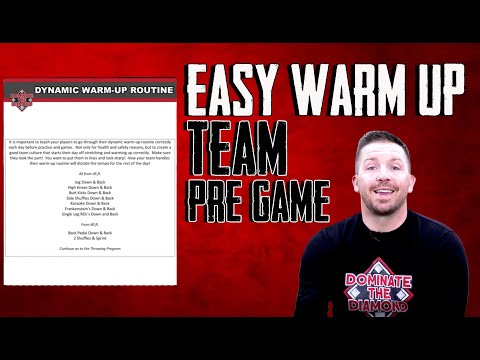
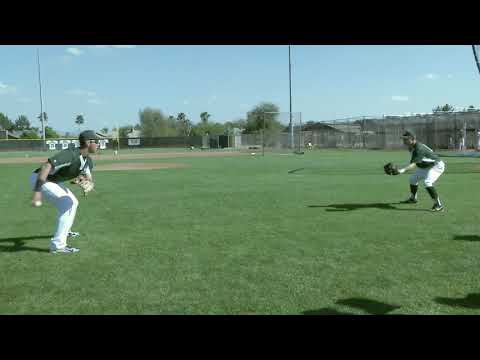
Easy Team Warm Up Routine for Youth Baseball
A comprehensive team-scale warmup routine combining dynamic movements and progressive throwing exercises, perfect for getting young players ready for practice or games.
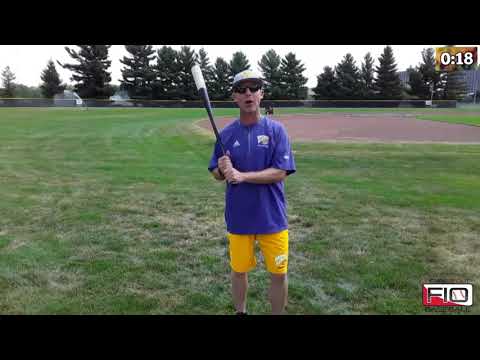
Easy Warmup Routine to Get Ready for Batting Practice
Targeted warmup routine designed specifically to prepare hitters for batting practice, including weighted bat work and swing-specific movements.
How To Warm Up for a Baseball Game - BEST Pre-game Warm Up
The most effective pre-game warmup sequence demonstrating key movements to properly limber up and prepare for competition. Quick, efficient, and comprehensive.

Pre-Game Baseball Warm-Up
A complete pre-game movement warmup routine designed to prepare players physically and mentally for competition.
Pre-Game Routine Guide for Baseball Pitchers
Comprehensive pre-game warmup combining physical preparation, mental readiness, and progressive throwing specifically designed for starting pitchers.
Pro Pitcher Warm-Up
Professional-level pitcher warmup routine with detailed explanations of each phase. Learn the exact sequence used by pro pitchers to prepare for maximum performance.

The 8 Baseball Warm Up Exercises You MUST DO Before A Game
Core collection of 8 essential warmup exercises covering all critical areas for pre-game preparation. These fundamental drills prepare players physically and reduce injury risk.
Warm Up Like A PRO With This Routine
Complete full-body dynamic warmup routine used by professional players for practice and game preparation. Covers all essential movement patterns and muscle groups.
Youth Baseball Practice Warm-Up Routine
A simple, effective warmup routine combining light stretches, dynamic movements, and throwing tasks perfect for youth baseball practice sessions.
Agility, speed training, and baseball-specific fitness
14 Best Gym Exercises For Baseball
Comprehensive catalog of the most effective gym exercises specifically selected for baseball performance. Complete exercise library for program design.
At Home No Equipment Baseball Workout
Complete bodyweight training program requiring no equipment. Perfect for home training, travel, or in-season maintenance when gym access limited.
Baseball Hitting Power & Strenght Workout
Targeted strength and power workout designed specifically to increase hitting power. Focus on rotational strength and explosive hip drive.
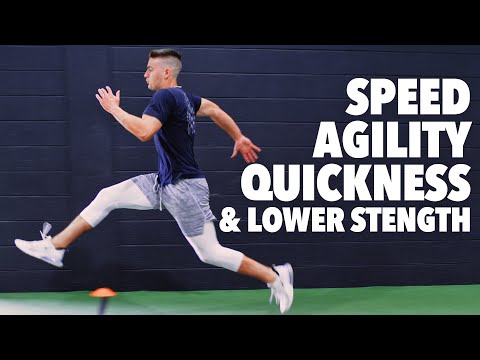
Baseball Speed, Agility, Quickness and Lower Body Strength Workout
Combined lower body strength and speed/agility training session. Develop explosive power and movement skills in single comprehensive workout.
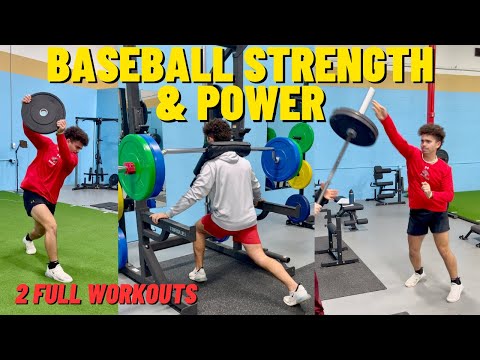
Baseball Workouts for More Power
Two complete upper and lower body training sessions designed for baseball players. Comprehensive program for building strength and power.
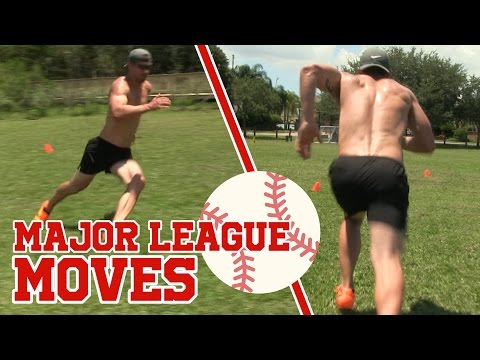
Best Conditioning Drills for Baseball — Speed, Agility, Quickness
Comprehensive conditioning program emphasizing speed development, agility patterns, and quickness drills. Improve on-field performance and endurance.
Body Weight Exercises for Baseball Players
Essential bodyweight strength circuit for baseball players focusing on functional movements that translate directly to on-field performance.
Core Strengthening Exercises for Baseball Players
Ground-based core exercises that build rotational power and stability essential for hitting velocity and throwing arm strength.
Rotational Strength & Power Workout for Pitchers
Elite-level rotational strength and power training used by MLB pitchers. Develop core power and rotational velocity for pitching performance.
Seated Core Strengthening Exercises for Baseball Players
Seated core stability exercises that isolate the abdominal muscles and develop the strong foundation needed for powerful baseball movements.

The Baseball Workout Formula: Building Your Own
Eight safe, baseball-specific strength exercises that form the foundation of an effective training program. Build your own customized workout routine.

The Best Baseball-Specific Strength Workout You'll Ever Do
Comprehensive full-body baseball strength program targeting all major muscle groups with sport-specific movements. Complete workout for building baseball athleticism.

Upper Body Power & Strength Workout for Elite Baseball Athletes
Advanced upper body training focused on developing explosive power and functional strength for elite-level baseball performance.
Need help running your practice?
Use our Practice Planner to build baseball practices tailored to your team in minutes.
Why Coaches Love Our Baseball Drill Library
Every drill is designed for maximum engagement and skill development
High-Rep Focused
Maximum touches and repetitions. Keep lines short and players engaged with efficient station work.
Skill-Appropriate
Every drill includes progressions for all skill levels—from beginners learning fundamentals through advanced competitive players.
Easy to Learn
Clear setup diagrams, step-by-step instructions, and common mistakes to avoid for every drill.
How to Choose the Right Baseball Drills for Your Team
Not all baseball drills are created equal. The best drill for your team depends on several factors: age and skill level, team goals, available equipment, practice time, and how many coaches or helpers you have. Here's how to select drills that maximize learning and keep players engaged.
Match Drills to Skill Level
Youth players ages 4-6 need drills focused on basic motor skills and having fun. They can't handle complex instructions or long explanations. Look for drills tagged "beginner" that involve running, catching soft balls, and hitting off a tee.
Players ages 7-8 are ready for basic mechanics work—proper throwing motion, batting stance, and fielding ground balls. Ages 9-12 can handle position-specific training and strategic concepts. High school players (13+) benefit from advanced drills that simulate game situations and build competitive skills.
Focus on What Matters Most
Every baseball team has areas that need work. Identify your top 2-3 skill gaps (struggling with fly balls? Not making contact at the plate? Poor throwing accuracy?) and filter our drill library by those categories.
Don't try to fix everything at once. Running hitting drills for two weeks straight is more effective than doing one hitting drill per practice all season. Focus creates mastery.
Consider Your Coaching Resources
Solo coaches need drills that keep everyone busy without requiring supervision at every station. Look for drills where kids can work in pairs or small groups semi-independently.
If you have assistant coaches or parent volunteers, you can run multiple stations simultaneously. Our station-based baseball practice plans show you how to set up 3-4 drill stations where players rotate every 10-15 minutes, maximizing touches for everyone.
Pro Tip: The "High-Rep" Filter
When browsing drills, look for ones that give each player 10+ repetitions per rotation. Drills where kids stand in long lines waiting for a turn waste time and kill engagement. The best baseball drills keep everyone moving.
Age-Appropriate Baseball Drill Selection Guide
What works for 13-year-olds will frustrate 6-year-olds—and vice versa. Here's what to prioritize at each developmental stage, plus specific drill recommendations from our library.
Tee Ball & Beginner Level
Attention span: 5-7 minutes per activity
Focus Areas:
- Basic motor skills: Running, catching large soft balls, throwing toward a target
- Making contact: Hitting off a tee or soft toss from very close range
- Fun & engagement: Games, relay races, positive reinforcement
- Following directions: Waiting for turns, listening to coaches, staying with the group
Best Drill Categories:
Browse tee ball hitting drills, basic throwing drills, and fun warm-up activities. Avoid complex fielding mechanics or competitive drills at this age.
Coach Pitch & Machine Pitch
Attention span: 8-12 minutes per activity
Focus Areas:
- Proper mechanics: Batting stance, grip, throwing motion, ready position
- Fielding fundamentals: Ground balls, fly balls, underhand & overhand throws
- Hitting moving balls: Transition from tee to coach pitch or machine
- Basic rules: Where to throw, when to run, staying in positions
Best Drill Categories:
Focus on ground ball and fly ball drills, soft toss and tee work, and throwing accuracy drills. Introduce baserunning fundamentals.
Kid Pitch & Competitive Youth
Attention span: 12-18 minutes per activity
Focus Areas:
- Position-specific skills: Outfield footwork, infield double plays, catcher blocking
- Game situations: Cutoffs, relays, rundowns, bunt defense
- Advanced hitting: Pitch recognition, opposite field hitting, situational hitting
- Pitching basics: Grip, delivery, control, change-up
Best Drill Categories:
Emphasize advanced fielding scenarios, live batting practice, pitching mechanics, and team defense drills. Include competitive elements.
High School & Advanced Travel
Attention span: 15-25 minutes per activity
Focus Areas:
- Refinement: Fine-tuning mechanics, maximizing power & speed
- Strength & conditioning: Arm care, speed work, explosive movements
- Mental game: Pressure situations, focus drills, competitive mindset
- Strategy & IQ: Reading pitchers, defensive shifts, advanced baserunning
Best Drill Categories:
Use conditioning and agility drills, mental skills training, advanced pitching sequences, and game-speed scenarios. Increase intensity and competition.
Common Baseball Drill Mistakes (And How to Fix Them)
Even experienced baseball coaches make these mistakes when running drills. Here's how to avoid the most common pitfalls that reduce effectiveness and player engagement:
Mistake #1: Long Lines = Bored Kids
When you have 12 kids in line for one batting cage or one fielding station, most of your practice time is wasted. Players get 3-4 swings in 90 minutes and spend the rest picking grass.
The Fix:
Break into smaller groups of 3-4 players per station. Set up multiple hitting stations (tee, soft toss, live pitching) or multiple fielding spots. Browse our drill library filtering by "small groups" to find drills designed for 2-5 players that maximize touches.
Mistake #2: Talking Too Much, Doing Too Little
Coaches spend 10 minutes explaining a drill, then players get 5 minutes to actually do it. Kids learn by doing, not listening to lectures.
The Fix:
Keep instructions under 60 seconds. Demonstrate the drill once, then let kids try while you coach. Use the "show, don't tell" approach—grab a player to demonstrate rather than describing everything verbally. Make adjustments during the drill, not before.
Mistake #3: Making Drills Too Complex
Drills with 8 steps and lots of moving parts confuse players. They spend mental energy remembering what to do instead of focusing on the skill you're teaching.
The Fix:
Simple drills with clear objectives work best. If you can't explain the drill in one sentence, it's probably too complicated. Start simple, then add complexity as players master the basics. Our drill filters let you find "beginner" versions of any skill.
Mistake #4: No Progression or Regression
Running the same drill the same way all season doesn't account for skill improvement. Advanced players get bored, struggling players never catch up.
The Fix:
Every drill should have 2-3 difficulty levels. For fielding, progress from stationary ground balls → slow rollers → hard grounders → bad hops. For hitting, go from tee → soft toss → slow pitch → game-speed. Our drills include progression notes showing how to adjust difficulty.
Mistake #5: Drills Don't Match Game Situations
Practicing skills in isolation (like fielding grounders with no runners, no urgency) doesn't prepare kids for real games where they need to make quick decisions under pressure.
The Fix:
Add game context to drills. Instead of just fielding ground balls, have players field and throw to first while calling "runner on second!" Do situational hitting where batters know the game scenario (runner on third, less than 2 outs). This builds decision-making skills alongside physical skills.
Maximizing Repetitions and Player Engagement During Drills
The best baseball drills share one trait: they keep players active and engaged. Here's how to get the most out of every drill in your practice plan.
Use Timed Rounds
Instead of saying "everyone gets 5 reps," set a 10-minute timer. This creates urgency, keeps energy high, and prevents one slow group from holding everyone up.
Example: "You have 10 minutes at this hitting station. Get as many quality swings as possible, rotate through quickly."
Partner Drills Work Best
Pair up players whenever possible. While one hits, the other fields or feeds balls. This doubles engagement and reduces downtime. Plus, kids often coach each other better than adults do.
Look for drills tagged "partner drill" in our library.
Add Competition (Carefully)
For ages 9+, friendly competition boosts engagement. Who can field 10 clean ground balls first? Which group gets the most line drives? Keep it light and positive—focus on beating personal bests, not embarrassing struggling players.
Avoid competition for ages 4-8. Focus on fun and mastery instead.
Specific, Immediate Feedback
Instead of "good job," give actionable feedback: "Great job getting your glove down early!" or "Try keeping your eye on the ball longer." This tells players exactly what to repeat or adjust.
Positive reinforcement works 3x better than criticism for youth players.
The 80/20 Rule for Youth Baseball Drills
Players should spend 80% of practice time actively doing (hitting, throwing, fielding) and only 20% listening or waiting. If your drills don't hit this ratio, you need more stations, smaller groups, or simpler drills.
Track this for one practice: time how long each player actually has a ball in their hand or bat in the zone. You'll likely be shocked how little action happens in traditional practice formats. Station-based practices (like our free templates) solve this problem.
Frequently Asked Questions About Baseball Drills
How many drills should I use in one practice?
For 60-minute practices, aim for 4-6 different drills (not counting warm-up). For 90 minutes, 6-8 drills works well. Quality over quantity—it's better to do 3 drills really well than rush through 10. Younger teams (ages 4-8) need more variety since attention spans are shorter; older teams can spend more time on fewer drills going deeper.
How long should each drill last?
General guideline: Ages 4-6: 5-7 minutes per drill before switching. Ages 7-8: 8-12 minutes. Ages 9-12: 12-18 minutes. Ages 13+: 15-25 minutes. Watch for engagement—if kids are losing focus or getting sloppy, move on even if you planned more time. Energy beats perfection at youth levels.
What are the best hitting drills for beginners?
Start with tee work drills to build basic swing mechanics without the complexity of a moving ball. Progress to soft toss from short distances (10-15 feet). Focus on making contact and tracking the ball—don't worry about power or perfect form yet. Games like "hit the target" (placing cones in the field to aim at) make it fun while building bat control.
How do I keep players engaged during drills?
Three keys: (1) Small groups—never more than 5 kids per station. (2) Constant movement—if a player waits more than 30 seconds between reps, your setup needs work. (3) Make it fun—add music, use colorful equipment, celebrate effort loudly, turn drills into games with light competition. For ages 4-8, theme practices around fun names ("superhero fielding day") to boost buy-in.
Should I focus on one skill or do a variety each practice?
Both approaches work for different situations. Theme practices (hitting-focused, defense-focused) allow deeper skill development and are great when you've identified specific team weaknesses. Variety practices that touch all skills keep things fresh and are better for early season or younger teams. A good balance: Pick 2 focus skills per practice, spend 60-70% of time there, and do one fun "bonus" drill in another area.
What equipment do I need for most baseball drills?
Essential: Balls (1 per 2 players minimum), bats, gloves, batting tees (2-3), cones or markers, bases. Nice to have: Soft toss net, L-screen for protection, agility ladder, resistance bands, pitching target/strike zone mat. You can run excellent practices with just the essentials—our drills note required equipment so you can filter by what you have available.
How do I modify drills for different skill levels on the same team?
Use progression layers within each drill. For fielding: Advanced players field hard grounders from 40 feet, beginners get slow rollers from 20 feet. For hitting: Strong hitters get live pitching, developing hitters use soft toss or tee. Group by ability for skill work, then bring everyone together for team drills and scrimmages. Our drill library includes progression notes showing exactly how to adjust difficulty up or down.
When should I introduce position-specific drills?
Ages 4-8: Everyone should try all positions. Focus on general skills. Ages 9-10: Start dedicating 10-15 minutes per practice to position work as kids begin to show preferences. Ages 11+: Spend 25-30% of practice time on position-specific training. Even then, cross-train players—don't lock 10-year-olds into one position forever. Browse our position-specific drills filtered by age.
How often should I change drills throughout the season?
Introduce 2-3 new drills every 2-3 weeks while keeping a few favorites in rotation. Kids benefit from repetition (mastery comes from doing the same drill multiple times), but too much repetition kills engagement. A good system: Keep 50% of your drills consistent week-to-week for skill building, rotate the other 50% for variety. Download multiple practice plan templates to build a seasonal rotation.
Can I run effective drills as a solo coach with no assistants?
Absolutely. Look for drills that are "self-running" where players work in pairs or small groups with minimal supervision once you demonstrate. Examples: Partner toss drills, small-group fielding circuits, tee work stations. Set up 2-3 stations, demonstrate each one, then rotate between them giving feedback. Recruit a reliable parent or older sibling to help supervise (they don't need to coach, just watch for safety). Our drill library has a "minimal supervision" filter for exactly this scenario.
Ready to Put These Drills Into Action?
Browse our complete library of baseball drills above, or build a custom practice plan using our free practice planner tool. Choose drills by category, age level, and equipment available.