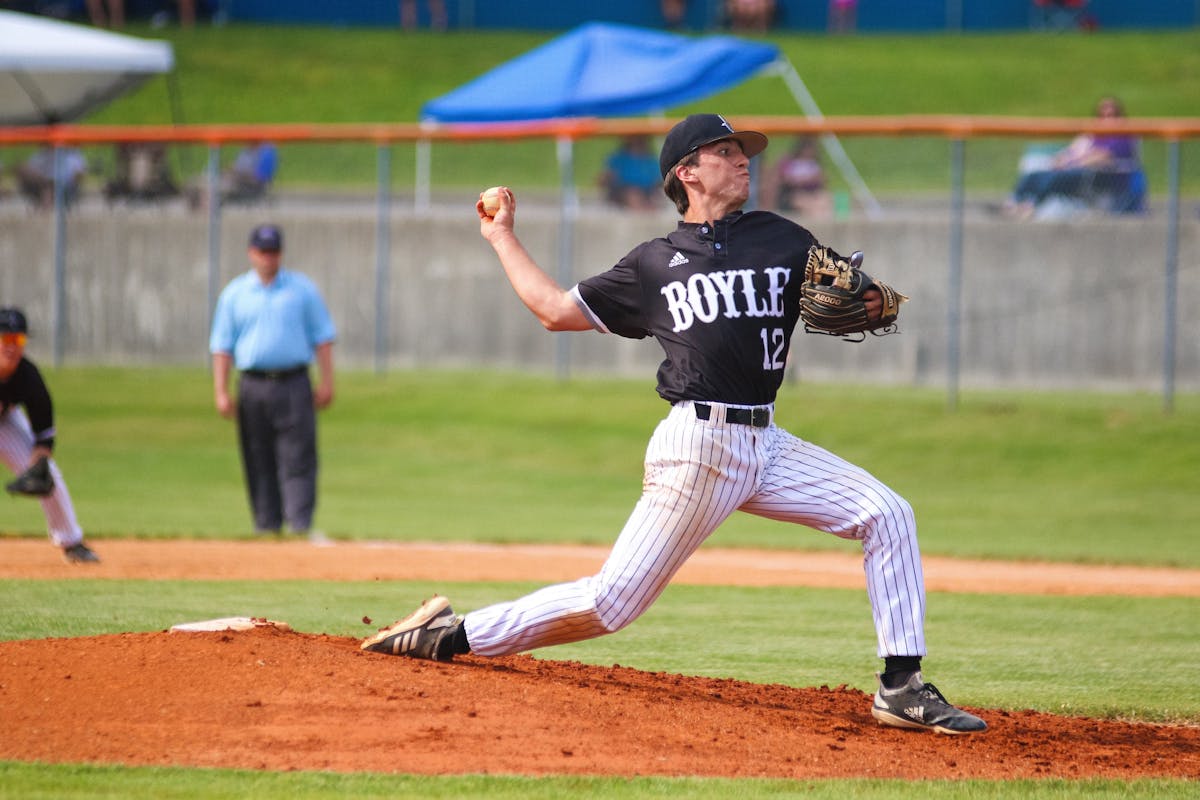
Throwing Mechanics
Proper throwing mechanics are the foundation of every defensive play in baseball and softball. Teaching correct technique early prevents injuries and builds arm strength that lasts a career. This guide breaks down the throw into teachable components.
The Four-Seam Grip
Every throw starts with the grip. The four-seam fastball grip provides the truest, most accurate throw.
How to Teach It
- Find the horseshoe - Look at the seams and find where they form a "C" or horseshoe shape
- Place the fingers - Index and middle fingers across the seams, about fingertip-width apart
- Thumb underneath - Rest the thumb on the bottom seam or smooth leather
- Fingertips on top - Grip with fingertips, not deep in the palm
- Light grip - Firm enough to control, loose enough for snap
Common Grip Mistakes
| Mistake | Problem | Fix |
|---|---|---|
| Palm ball | No spin, slow throw | Grip with fingertips only |
| Fingers together | Less control | Space fingers apart |
| Death grip | Tension in arm | "Hold it like an egg" |
| Two-seam grip | Movement, less accuracy | Find the horseshoe |
Teaching Tip
Have players practice finding the four-seam grip in their glove without looking. This becomes automatic with repetition.
Ready Position
Before the throw, the body must be in an athletic ready position.
Key Points
- Feet shoulder-width apart - Stable base for balance
- Knees slightly bent - Ready to move
- Weight on balls of feet - Quick first step
- Glove centered - Ready for any ball
- Eyes on target - Track the ball
The Throwing Motion
Break the throw into four phases for teaching purposes.
Phase 1: Separation
When the ball comes out of the glove, both arms work together.
Glove Arm:
- Points at the target
- Creates direction and balance
- Stays up until the throw
Throwing Arm:
- Breaks down, back, and up
- Elbow leads the hand
- Creates the "power position"
Phase 2: Power Position
The moment before the arm accelerates forward.
Checkpoints:
- Throwing elbow at shoulder height
- Ball facing away from target (not toward sky)
- Front shoulder pointing at target
- Weight loaded on back leg
- Hips still closed
Phase 3: Acceleration
The arm moves forward to release.
Sequence:
- Hips rotate open first
- Torso follows the hips
- Arm whips through last
- Elbow leads, then wrist snaps
- Release point out in front
Phase 4: Follow-Through
Completing the motion protects the arm.
Key Elements:
- Arm continues across the body
- Back leg drives through
- Chest finishes over front knee
- Arm decelerates naturally
- End in fielding position
Footwork Patterns
Different situations require different footwork.
Standard Crow Hop
Used for outfield throws and longer distances.
- Catch the ball - Secure the catch first
- Replace feet - Throwing-side foot replaces glove-side foot
- Hop and align - Small hop to align feet to target
- Drive and throw - Push off back foot into throw
Quick Exchange
Used for infielders making routine plays.
- Catch with momentum - Move toward the target while catching
- Shuffle step - Quick shuffle to get feet aligned
- Throw on the move - Release before feet are fully set if time allows
Pivot and Throw
Used when turning to throw in opposite direction.
- Catch the ball - Secure first
- Drop step - Step back with throwing-side foot
- Open hips - Rotate to face target
- Set and throw - Quick throw from power position
Common Mechanical Flaws
Short Arming
What it looks like: Elbow stays bent, push instead of throw Why it's bad: Less velocity, more arm stress Fix: "Reach back and throw through the target"
Elbow Below Shoulder
What it looks like: "Sidearm" or "submarine" motion Why it's bad: Less accuracy, inconsistent release Fix: "Get your elbow up, point to the sky"
No Hip Rotation
What it looks like: All arm, no body involvement Why it's bad: Weak throws, arm fatigue Fix: "Turn your belt buckle to the target"
Stopping Follow-Through
What it looks like: Arm stops abruptly after release Why it's bad: Shoulder and elbow stress Fix: "Finish your throw, reach to the target"
Opening Early
What it looks like: Front shoulder flies open before release Why it's bad: Loss of power and accuracy Fix: "Keep your front shoulder closed longer"
Throwing Drills for Practice
Wrist Flips (5 minutes)
Partners kneel facing each other at 10 feet.
- Throw using only wrist snap
- Focus on four-seam rotation
- Builds feel for the release
One-Knee Throws (5 minutes)
Throwing-side knee down, front foot toward partner.
- Forces upper body mechanics
- Removes lower body compensation
- Good for fixing arm path
Power Position Throws (5 minutes)
Start in the power position, throw from there.
- Elbow at shoulder height
- Ball facing away
- Focus on hip rotation and arm path
Full Motion at Close Distance (5 minutes)
Full crow hop from 30-40 feet.
- Work on smooth, connected motion
- Focus on one mechanical element
- Don't overthrow at close range
Long Toss (10 minutes)
Gradually increase distance to build arm strength.
- Start at 60 feet, add 10 feet at a time
- Maintain proper mechanics
- Arc is okay at distance
- Work back in with flat throws
Age-Specific Teaching Points
Ages 6-8
- Focus on grip and release only
- Emphasize "point your glove at the target"
- Keep it fun with games
- Distance: 30-40 feet maximum
Ages 9-10
- Introduce footwork patterns
- Teach power position concept
- Work on consistency
- Distance: 60-90 feet
Ages 11-12
- Refine full mechanics
- Introduce long toss program
- Work on quick exchange
- Distance: 90-120 feet
Ages 13-14
- Position-specific footwork
- Advanced throwing patterns
- Build arm strength safely
- Distance: 120+ feet
Building Arm Strength Safely
Key Principles
- Warm up first - Never throw hard on a cold arm
- Progress gradually - Add distance and intensity slowly
- Listen to the arm - Pain means stop
- Count throws - Track daily volume
- Rest days matter - Arms need recovery
Recommended Throw Counts
| Age | Daily Max | Weekly Max |
|---|---|---|
| 8U | 40 | 150 |
| 10U | 50 | 200 |
| 12U | 60 | 250 |
| 14U | 75 | 300 |
These are guidelines for practice throws, not games.
Key Reminders
- Grip first - Four-seam grip on every throw
- Use your body - Hips and legs create power
- Elbow up - Protects the arm and improves accuracy
- Follow through - Complete the motion every time
- Quality over quantity - Ten good throws beat fifty bad ones
- Build slowly - Arm strength takes time to develop