How to Stop Short Arming When Throwing: A Parent's Guide to Fixing This Common Problem
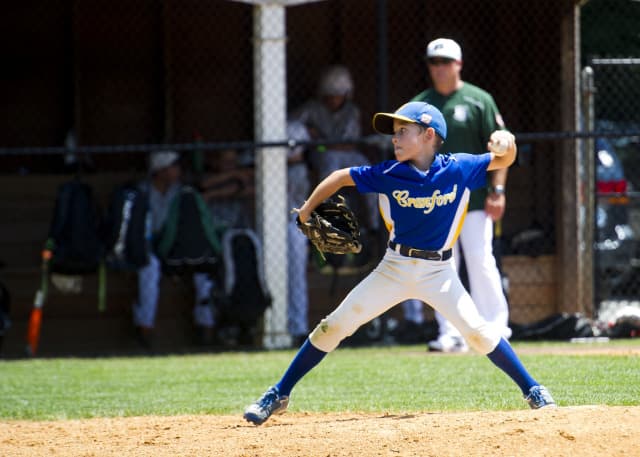
If you've watched your child throw and something looks "off" but you can't quite name it, there's a good chance they might be short arming. It's one of the most common throwing flaws in youth baseball, and the good news is it's very fixable with the right approach.
Short arming affects players at every level, from t-ball to high school. The sooner you address it, the easier it is to correct. Left unchecked, it can limit your child's throwing velocity and, more importantly, increase their risk of arm injuries.
This guide will help you understand what short arming is, how to spot it, why it happens, and most importantly, how to fix it with simple drills your child can practice at home.
What Is Short Arming?
Short arming happens when a player doesn't fully extend their arm backward during the throwing motion. Instead of the arm going back and creating a full "L" shape at shoulder height, the arm stays bent and compact, like they're trying to throw from a cramped space.
Think of it this way: A proper throw is like a whip, the arm extends back to generate momentum, then snaps forward. Short arming is like trying to crack that whip without pulling it back first. You lose all the power that comes from a full arm path.
What It Looks Like
When a player short arms:
- The elbow stays close to the body
- The throwing hand barely gets behind the head
- The ball often faces up toward the sky instead of back toward second base
- The throw looks "pushy" or "stabby" rather than fluid
- The release point is often too early (beside the head instead of out front)
What It Should Look Like
A proper arm path includes:
- The arm extending back with the elbow at shoulder height
- A clear "L" shape where the forearm is roughly perpendicular to the upper arm
- The ball facing backward (toward center field if they're at home plate)
- A smooth, whip-like motion where the arm accelerates through release
Why Short Arming Is a Problem
Short arming isn't just a style preference, it creates real problems:
1. Reduced Velocity
Without a full arm path, your child can't generate maximum arm speed. The throw may feel effortful, but the ball comes out slow. Players with good mechanics throw harder while looking like they're throwing easier.
2. Decreased Accuracy
Short arming often causes an inconsistent release point. Sometimes the ball comes out early, sometimes late. This makes it hard to throw accurately because the release changes with every throw.
3. Increased Injury Risk
This is the big one. When the arm doesn't have room to decelerate properly, stress concentrates on the elbow and shoulder. Over time, this can lead to:
- Little League elbow
- Shoulder impingement
- Rotator cuff strain
Young arms are resilient, but repeated stress from poor mechanics adds up. Fixing short arming now protects your child's arm for years to come.
4. Bad Habits Get Worse
The longer a player short arms, the more ingrained the pattern becomes. Muscle memory is powerful, and it works both ways. Teaching proper mechanics early prevents a much harder fix later.
Why Does Short Arming Happen?
Understanding the cause helps you address the root problem, not just the symptom.
Cause 1: Fear of Throwing Hard
Some kids are afraid of "letting it rip." They tense up and keep the ball close to their body, as if holding back. This is especially common after a wild throw or error that embarrassed them.
Solution: Build confidence with low-pressure throwing. Praise effort and mechanics, not just results.
Cause 2: Trying to Aim
When kids focus too much on hitting a target, they often sacrifice mechanics for perceived control. They "guide" the ball instead of trusting their body to deliver it.
Solution: Remind them that accuracy comes from consistent mechanics, not from careful aiming. "Throw, don't aim."
Cause 3: Never Learned Proper Mechanics
Many kids simply weren't taught to extend their arm. They developed their own throwing motion through trial and error, and short arming felt natural.
Solution: Introduce proper arm path through drills (covered below). Show them what it should feel like.
Cause 4: Weak Arm or Fatigue
A tired arm naturally shortcuts the motion. The body instinctively conserves energy, and a compact throw takes less effort than a full one.
Solution: Monitor throwing volume. If short arming appears late in practice or games, the arm may be fatigued.
Cause 5: Playing Infield Only
Infielders sometimes develop short arming because they practice quick throws from close range. They get used to snapping the ball without a full wind-up.
Solution: Include long toss in every practice. Make sure infielders practice full throws, not just flips and short tosses.
How to Spot Short Arming
Here's a simple test to see if your child is short arming:
The "Ball Direction" Test
- Have your child throw to a target
- Watch their arm at the highest point before release
- Ask yourself: Where is the ball pointing?
- Correct: The ball should face backward, toward the outfield or center field
- Short arming: The ball faces up toward the sky
The "L Check" Test
- Pause them mid-throw (or take a video and pause it)
- Look at the throwing arm at its highest point
- Is the elbow at shoulder height forming an "L"?
- Correct: Clear L-shape, elbow high
- Short arming: Elbow below shoulder, arm stays compact
The "Easy vs. Hard" Comparison
- Have them throw at 50% effort, then 100% effort
- Watch if the arm path changes
- Players who short arm often look the same at both speeds, they can't add velocity because they're not using their full arm

Drills to Fix Short Arming
Build a Throwing Correction Practice
Need help organizing these drills into a structured practice? Our free Practice Planner makes it easy to create custom practices focused on fixing throwing mechanics.
Drill 1: Long Toss
Why it works: Long toss forces a full arm extension. You simply can't throw far with a short arm.
How to do it:
- Start 30 feet apart playing catch
- After 10 throws, each player takes 5 steps back
- Continue until you're 80-120 feet apart (depending on age)
- Focus on arc, the ball should go up, not line drives
- Work back in gradually
Key cue: "Reach back like you're trying to touch the fence behind you."
Do it: 2-3 times per week, 10-15 minutes per session
Drill 2: The Fence Drill
Why it works: A physical barrier prevents short arming by making the player extend.
How to do it:
- Stand with your back about 2-3 feet from a fence or wall
- Go through your throwing motion without releasing
- Your arm should reach back and almost touch the fence
- If you can't reach the fence, you're short arming
- Practice until you can consistently reach back
Key cue: "Reach back and tap the fence with the ball before you throw."
Do it: 10 reps before every throwing session
Drill 3: Separation Drill (Scarecrow Drill)
Why it works: Isolates the arm action and creates awareness of the proper position.
How to do it:
- Start with arms out to the sides like a scarecrow
- Both arms should be at shoulder height
- Bend the throwing arm into the "L" position
- Ball should face backward
- Hold this position for 2 seconds, then throw
Key cue: "Scarecrow... L... throw."
Do it: 10-15 reps as part of warm-up
Drill 4: Knee Drill Progression (Go Back to Fundamentals)
Why it works: Simplifies throwing to just the arm. By getting on a knee and building up in stages, you force the arm to stay up without the complexity of the full throwing motion.
How to do it (3 stages):
Stage 1: Dart Throws (Hold the Wrist)
- Kneel on your throwing-side knee
- Take off the glove temporarily
- Grab your throwing wrist with your glove hand and hold your arm UP, elbow at shoulder height
- Make short "dart throws" to a partner about 5 yards away
- Your arm stays up the entire time, you're just snapping from the wrist
- Do 10 throws
Stage 2: Hold the Elbow
- Same kneeling position
- Now hold your throwing elbow with your glove hand
- Your arm is still up, but now you can use more of the throwing motion
- Make throws incorporating your full arm action
- Do 10 throws
Stage 3: Arm Up, No Support
- Same kneeling position
- Start with the ball already UP in the throwing position
- Don't hold anything, but don't let your arm collapse down
- Your arm can go back slightly, but keep it high
- Make throws from this elevated starting position
- Do 10 throws
Key cue: "Keep your arm up. Don't let it collapse."
Do it: All three stages as a sequence, 2-3 times per week
Drill 5: Towel Drill (For Feel)
Why it works: A towel is lighter than a ball and helps players feel the whipping motion.
How to do it:
- Hold a small hand towel by one corner
- Go through your full throwing motion
- Try to make the towel "snap" at the end
- If you're short arming, the towel won't snap, it'll just flop
Key cue: "Make it crack like a whip."
Do it: 10 reps before throwing with a ball
Drill 6: Turn and Throw
Why it works: Creates rhythm and forces a full arm circle.
How to do it:
- Start facing your target with both hands on the ball at your chest
- Turn sideways, separate hands, and extend your arm back
- Continue into your throw
- The continuous motion prevents the arm from "sticking" in a short position
Key cue: "Turn, reach, throw, one smooth motion."
Do it: 10-15 throws as part of warm-up
Drill 7: Conscious Catch (Arm Already Up)
Why it works: Forces your arm to stay elevated by starting in the correct position. Most short arming happens because players let their arm drop before throwing, this drill removes that habit.
How to do it:
- Stand normally with a partner (don't kneel)
- After catching the ball, immediately get your arm UP into the throwing position, elbow at shoulder height, ball up
- Don't start with the ball in your glove like normal catch
- Step forward (or behind, whichever feels comfortable) and throw
- Your arm can go back as you step, but don't let it drop below shoulder height
Important: No talking, no messing around. This is focused, conscious practice. Have your partner watch to make sure your arm isn't collapsing.
Key cue: "Catch, arm up, step, throw. No dropping."
Do it: 10-15 throws after warm-up, focused and deliberate
Drill 8: Basketball Dribbling Drill (Loosey-Goosey)
Why it works: Short arming often comes from overthinking and being timid. This drill keeps your arm loose and natural so you don't have time to tense up and keep everything in tight.
How to do it:
- Stand with a partner at normal playing-catch distance
- Act like you're dribbling a basketball with your throwing hand, arm swinging loosely at your side
- Keep "dribbling" (arm swinging) while your partner throws to you
- Catch the ball, and immediately step and throw in one motion from your natural arm swing
- Don't pause, don't think, just catch and throw
Why this works: When your arm is already loose and moving, you can't short arm. There's no time to get tight and keep everything in close. Your arm naturally extends.
Key cue: "Dribble, catch, throw. Stay loose."
Do it: 10-15 throws as part of catch routine
The Mirror Effect: Equal and Opposites
One last critical concept: Your throwing arm and glove arm should work like a mirror, equal and opposite.
When your hands separate:
- Both arms move apart at the same time
- Thumbs break DOWN (not up, not sideways)
- If your glove goes forward, your throwing arm goes back
- If your glove is high, your throwing arm is high
The problem with short arming: Often players break their glove first and leave their arm behind, or they break their arm first without the glove moving. This throws off timing and leads to a compact, short arm path.
The fix: Focus on everything happening together. Thumbs down, arms apart, mirror image.
What to Say (And What NOT to Say)
The words you use matter. Here are some helpful cues and some to avoid:
Say This:
- "Reach back and show the ball to center field"
- "Let your arm go all the way back before you throw"
- "Make a big arm circle"
- "Get long before you get fast"
Avoid This:
- "You're short arming!" (labels the problem without helping)
- "Throw harder!" (makes them tense up more)
- "Just throw normal" (they think they ARE throwing normal)
- "What are you doing?" (creates frustration)
Remember: Your child isn't short arming on purpose. They need specific cues and lots of patient repetition.
How Long Does It Take to Fix?
Every player is different, but here's a general timeline:
- 1-2 weeks: Player becomes aware of the problem and can sometimes correct it when reminded
- 3-4 weeks: New mechanics start to feel more natural during drills
- 6-8 weeks: Improvement shows up in games and pressure situations
- Full season: New pattern becomes the default (muscle memory is rebuilt)
The key is consistency. Five minutes of focused drill work every day beats one long session per week.
When to Get Help
Most short arming can be fixed with consistent practice at home. But consider seeking a coach or instructor if:
- Your child has persistent arm pain
- The problem doesn't improve after 4-6 weeks of consistent work
- They're losing confidence because of throwing struggles
- You're not sure if you're identifying the problem correctly
A single lesson with a qualified instructor can provide cues and drills specific to your child's needs.
Frequently Asked Questions
My child only short arms when they rush. Is that normal?
Yes, this is very common. Under pressure, players revert to comfortable habits. The fix is lots of practice at slower speeds until the new pattern is automatic, then gradually increasing intensity.
Will my child throw slower while fixing this?
Temporarily, maybe. Learning new mechanics often means slowing down to focus on form. But once the new pattern takes hold, velocity will increase, often dramatically.
Is short arming genetic or learned?
It's almost always learned (or not learned). Kids develop throwing patterns based on what feels natural and what they've seen. Proper coaching can change the pattern.
Can short arming cause elbow pain?
Yes. Short arming puts extra stress on the elbow because the arm doesn't have enough time to decelerate. If your child has elbow pain, stop throwing and see a doctor.
My daughter throws sidearm AND short arms. Fix both at once?
Focus on the short arming first, that is the mechanical problem worth fixing. Short arming (keeping the ball up, compressing the arm path) reduces velocity and stresses the elbow regardless of arm slot.
The sidearm part is a separate question, and sidearm is not necessarily something that needs fixing. It is a legitimate arm slot used at every level of professional baseball. Once the arm path is full and healthy, reaching back through the throw, you can evaluate whether the arm slot is causing any real issues. In many cases, a sidearm thrower with a proper full arm extension throws accurately and without strain. Trying to change arm slot and fix short-arming at the same time creates too many variables to work on at once.
Final Thoughts
Short arming is common, but it's not permanent. With patience, the right drills, and consistent practice, your child can develop a full, healthy throwing motion that will serve them well throughout their baseball journey.
The most important thing is to address it now. The longer short arming continues, the harder it is to break. Start with one or two drills, focus on positive reinforcement, and trust the process.
Your child's arm will thank you.
Related Resources
Tags
Track Pitch Counts in Real Time
Count pitches from your phone during the game, see rest days for every pitcher, and know who is eligible before you hand over the ball.
Open the Pitch Count Tracker